Embossing Powdered Die Cut

So I love shiny things, and I love making elegant shiny embellishments to put onto cards! so when I saw this technique over at Craftsy from Wild cards 21 techniques with your card making materials, I knew I had do this one!

Really all you do is find a good die cut that will work with layering embossing powder on until\l it gets really shiny, or glossy from the embossing powder. I use Versa Mark ink and layer the powder on it till it's "done" about three coats of powder per die cut. (Shapes are from the Silhouette Design store)

I used the Heart to add embossing power to it, you can find it at the Silhouette Design store

I used the Thank You sentiment that I cut out with my Silhouette

Here is the other part to the Heart die cut, it came with the star you can find it here

I love this one, the flower cluster really made the card! the background I sprayed with glimmer Mist. You can find the flower die cut at the Silhouette Design Store


Did you have a favorite? I really had fun making these, and if you want an elegant way to make some cards pop, this is a way to do it!  I had all the supplies on hand, I didn't have to spend any money, so I "saved" some money right? and that's how it's done! 

Card Challenges with MFT, Fusion, Card Concept, Simon Says Stamps

This week card  Challenges Were really fun! The colors and sketches were really simple and I think It took me like 30 minutes for each card (Those are the ones I love to make!) It also helped that I didn't need to make a third trip to Micheals this week (we had grilled cheese for supper tonight because I spent to much at the craft store. it's only Wednesday! Opps.) Anyways... Here are the cards I have made!

Baby boy card, I used paper from my stash, a print and cut image from the Silhouette Online Store, and used the sketch to cut out the shapes to make the layers for this card from My Favorite Things Sketch challenge

Card sketch for the baby boy card


 Don't you love when a card comes together just right, and you think, man I couldn't have planned this better even if I tried. This was the story for this card, I found some colors that worked for the Card Concept blog, and it works well! The theme was sweet and sour colors, so warm and bright with green's and teals. I loved how the yellow and the pink works well together to get this card some personality! I'm going with a clean and layered style for this card.


 For the next card, I wanted a deep gratitude feel for teachers that have either have helped me, or that is now helping my children learn and grow. I thought the back ground paper with the little acorns were more symbolic to the fact that what they are doing is ever lasting like acorns, they grow into trees, provide food for animals, and so forth, I just really loved the symbolism with acorns and it reminded me of teachers and all the things the little acorns that they can produce!  This card is for the Fusion Card Challenge. I used the sketch part.


Simon Says Stamps challenge card theme was Gift it. So I added a vellum envelope gift card holder to the front of the card. I thought show casing those really cute gift cards during the Christmas season would be part of the card, along with a cute tag, to go with it.  


 Since there are no Christmas gift cards out right now that I could try and match some paper too, I used simple geometric pattern paper to help marry the card design with the gift card.


You may wonder why Christmas cards all ready, and I did too, but my theory that never seems to work, is that if I start now, It wont be so bad at Christmas time. And art is a process anyways, and it takes a lot of time to create.


You know me, I can never stop with just one, so I made it's brother, What do you think? 

I think that a gift card will look nicely in these cards! Now to figure out what type of gift card needs to go into this cute card... any suggestions?

And as always, a big shout out to Daniel Flanders and Craftsy for the guidance and inspiration!

Kids are off to school lets get Craftsy


Our friends at Craftsy are having a sale this weekend. ALL of their online classes are under $20 — Friday through Sunday. *This promotion ends Sunday, September 25, at 11:59 pm MT. Select classes are not eligible, including those from our partner The Great Courses®

If you are looking for a good class they have it all, Water color, knitting, crochet, paper crafting, wood working, and even gardening! this Sale is worth looking at. If you need some good classes here are some of my reviews

Really if you are looking ahead for Christmas and want to make something for Christmas presents, Take a Craftsy class that's on sale, you will be glad you did. on my Home made Christmas gift giving list is Caramel, Card sets, and other food gifts (we really like food at our house.) 

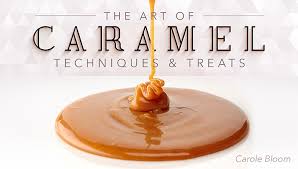
The Art of Caramel (perfect for the holiday gift giving season that's coming up)
Make the most of your food processor
The Perfect Cupcake (great for all)
21 wild tecniques with your paper crafting supplies
Water color tecniques with Mary Murphy (my favorite water color class so far)
Better Water color sketches with Angela Fehr

If you want to get to know what Craftsy is all about, I like their free classes, cheek them out here

I would love to know what classes you want to take, I love the idea that I have access to classes when ever I want, when I want. NO "going" to a class, or making "time" for it, it's available anytime I want. And yes I like to create at 5 am, I don't know why but that is my sweet spot for creating and learning... something about my house being quiet, and peaceful before school. I know I' m a crazy person! 

The perfect cupcake Craftsy Class review


I love cupcakes, everything about the process: picking out the ingredients, making the batter, frosting and of course then putting on the finishing touches with some sprinkles, and eating them makes me giddy! So I had to take the Perfect Cupcake class by Jennifer Shea from Trophy's cupcakes At Craftsy. It was like a match made in heaven! Seriously I loved watching this class. OK, I binged watched the class and then went to bed dreaming up different type of cupcakes an how to frost them.  Then daydreaming what I want to do when I am rocking my toddler to bed... so yeah, it's been fun.)

So the nuts and bolts of the class is this, it's not just a cupcake class. It's a baking class that taught me how to make lemon curd, Pie crusts, jams, creme brulee, a Lavender cream filling, and loads of other components to make a great cupcake.  She gives you some of her recipe that Trophy bakery uses everyday in the class hand outs the tips she gives you along the way is also very practical and useful. The lesson is jam packed with useful ideas to help with making the perfect cupcake.

I must say that the my favorite part of the class was watching/learning the different texture and flavor of the cake it's self. After pondering about all the different ways I could make a cupcake was incredible!  I couldn't take my eyes off of the decorating your cupcake lesson,The perfect cupcake class by Craftsy was very informative and worth the time and rescources to perfect a cupcake. Jennifer did a wonderful job teaching. Part of the Craftsy online classes is being able to ask questions about the content of the class and have the instructor give feed back, Jennifer did, and all the feed back were really good and helpful.

 Here are some of the cupcakes that I made so far!
filled cupcakes ready to be frosted!

The filled cupcakes were: black berry cherry jam filled (inspired by the blue berry slury from class) a Pinata cupcake, My kids really liked those, and Caramel Filling.


Caramel filled Cupcake

Marshmallow creme, or meringue frosting with vanilla caramel filled
 cupcake
Cherry Raspberry Jam filled cupcake with marshmallow or Meringue frosting
Roll frosted technique, great for fast frosting!


Display of cupcakes for a girl party


The filled cupcakes were for the teachers for my daughter's school, they were all delighted to have received such a wonderful cupcake! I got a lot of complements from the teachers, and they couldn't believe that there was caramel in side of them. (I kept the Jam filled cupcakes. for the family!)

The motivation behind taking this class was so I could figure out a good cupcake to make for gatherings and bake sales, and this class was perfect for that, I can't wait to keep experimenting with the different flavors and textures. 


Iowa Chocolates


So for my Husband's birthday I wanted to do something "sweet" for him, so I made him some chocolate caramel truffles.


Thanks to the Art Of Caramel class from Craftsy! It was really simple! use a favorite mold, mine was from a jello jiggler mold that turned into a chocolate mold.
1. Make the caramel sauce, as you would for apple dip, then chill it. (I would cook the caramel just a bit longer, like two minutes longer than the recipe said.) once it's cool keep it in the fridge, I made this a day before.
Watch this video, on how to do the rest!

 2 Melt the chocolate, I used semi sweet chocolate chips and some hershey bars.
3. make a mess and get the chocolate into the mold and leave some room for caramel. Let that shell harden.
4. Add the cool caramel to the chocolate, then seal the caramel with left over melted chocolate. Put it in the fridge to harden, then pop them out. Since it was hot and humid I kept the chocolates in the fridge.

My Favorite Things color challange


This color challenge was a bit of a challenge, but after looking at my stash of paper I made an easy decision of what I wanted to do. I found a card file from the Silhouette online store that I had to use on this color challenge and it worked out well! I must say I really like the colors together more that I thought I would. thank you MFT for the challenge!


I used a light craft paper for the base, Pink Vellum for the flowers, and a gem stone for the middle, then used some green pattern paper with a sentiment that I typed out using a script font. This was a fun card to play around with! (I did try to link the card design file from the silhouette design store, but it looks like it's unavailable now) this card was also inspired by the Craftsy Class Cards with deminsion by Daniel Flanders


Fusion Card Challange


I really love analogous colors, it makes my heart happy! So when I saw that the fusion card challenge was for green and yellow and black I thought OHH I can make that work well! I had some lime green vellum frames laying around and thought, hey, perfect time to use up some supplies, I am pleased with how it turned out.  I must say I really enjoyed the collage aspect to these cards! I got my brain into artist mode, and was a really fun to be part of!  Remember art is all about the process, not the end result!

I couldn't stop there so here are my other ones that I thought turned out well!
 I should also give a big shout out to the craftsy class that helped me with the inspiration, and that is from Cards with Dimension with Daniel Flanders her blog is pretty awesome cheek her out, but really a big shout out to Craftsy for creating this wonderful class that I hope to share more examples of what the classes have to offer.  


Verve Stamp Card Color Challange


I really enjoyed this color challange, purple and light blue are such a great color combination that it was easy to find just what I wanted to do!

For this card I used water color (Gansia Tambai (Kurtake)),  corn flower blue and deep violet,  I used a geometric stencil that I made from kraft paper to add the blue color  I used a floral stencil on top of the geometric stencil, and that worked well for the color combo! For the sentiment part I dipped some water color paper into the ink I was using and let it sit there to soak up, then let it dry. Once it was dry I stamped the Love collection of sentiments from Fiscars stamps. Adhered that to the card, then mounted that card onto a card bass.

Thank you Verve for providing such a fun color combination sketch. I had so much fun with the colors, I tried some other ones with the same colors.


As always most of these techniques I used I learned from Craftsy, These techniques were from the 21 wild techniques with your card making supplies!

My love affair with my food processor and Craftsy Class review

So.... I really love kitchen appliances, seriously it's like a love affair. The food processor has been on my list of things to buy for a long time. So I got a Kitchen Aid 11 cup food processor and I love it! It makes cooking and baking easy, Or what I should say is Baking is easier with a food processor!

So I knew the power behind my FP (food Processor) but like most new toys it's easier to play around and get to know it, but as a busy mom I didn't have time for that, so I entered into the world of Craftsy where they have classes on this stuff for people like me! So While I was playing blocks with my kiddo's and folding laundry I was able to watch the whole class, and learn how to use my new tool more efficiently, and creatively with my family in mind.


This class was my saving grace for time management, going in to this fall season I knew I needed to really start eating healthy, so the class gave me great examples on how to save time and eat healthy at the same time, The salad that Chef George Geary created, made me realize that I could have a salad every day. It was way cheaper to buy the heads of lettuce than to buy the bagged stuff anyways, in no time at all I was able to make and package up my salads for the week.


Chef George also had a whole lesson on just the dough blade! I enjoyed making the Cottage Bread, it was delicious, and extremely easy, He made it possible for me to make a loaf of bread that tasted like something you would get at a stake house! I then made the best pizza dough I have made in a long time and will never buy pre made pizza crust again.


The Peanut butter was such a great recipe to see, I am such a visual learner, and really have enjoyed learning how this easy process works. I decided that I wanted some Flax Seeds in my PB and why not make it!  At the store today I saw it on the shelf for $10.99 a jar! I was on a mission to make the same thing cheaper and so I did, I was able to make this same pb for under $4.00! Wha Who I saved us some money today!


the basic ingredients for Flax Seed Peanut Butter 

Flax seed peanut butter with animal cookies

Here is the simple recipe, adapted from the class
Peanut Butter
1 lb (2 cups) Roasted Peanuts, or other nut of your choice
2 Tbls of your favorite oil, I used Olive Oil
1/2 tsb of Cinnamon, or other spice that you would like, I used Cinnamon
1/2 tsb of salt (I used sea salt)
less than 1/4 Cup of brown sugar
1/4 cup Flax Seeds

process the nuts first with the blade for about 2 minutes. while the processor is running add the oil and the rest of the ingredients one at a time. then keep blending till you get the right constancy. We like eating it with animal crackers and apples.  This recipe is made best by viewing the lesson and then making it!

The last Recipe that I had to try was the Meat Loaf recipe. and it was so easy to make with the food processor, and it made my artist child happy while doing it, I got my hands all messy and it was fun to make!

This was such a great class, it really saved time for me, I now understand how to convert a recipe to use it for a food processor, I learned valuable tips that the pro's do to save time and energy, did you know that professional bakers don't always wash the bowl for every new batch of cookies, or cupcakes? They wash the bowl once at the end of the day. I also learned that you make all your dough one day and then bake the next day to save time, and energy. These are just some of the things that I learned from watching this class.

Other recipes that I want to try that were demonstrated in the class are:
Hummus,
Mayo,
cookie dough in the food processor (pb, chocolate chip, butter cookies)
Salsa


So what do you want to try in your food processor? The food processor is a tool that every good cook/baker needs and the Craftsy Class is a great companion!

Great deals on Craftsy two day only sale!


Broomstick Lace Scarf by Lion Brand Crochet Kit for $3.60, includes download pattern and all the yarn!


Get ready for crafting season with Craftsy's Farewell Summer Clearance! It's your last chance to save on some of Craftsy's most popular supplies — before they sail away.

Clean and Simple Card Challenge


Just thought I would post a simple card that I really loved making! I stamped, inked, sketched on my Silhouette, and cut out a sentiment on my Cameo.  I did it all for this card and it's a really a simple card that only took me a couple minutes!

I started with some ink, I put ink on my glass top and sprayed it to dilute the ink, then I used it as a water color to paint this effect, let that dry,  then stamped onto the watercolor part of the card with a simple bold flower stamp. Then I sketched out the Happy Birthday sentiment on my Cameo, cut it out with my cameo and placed a layer of teal card stock on the bottom of the banner, then adhered it to the card, I thought it needed something at the bottom so I used sequence.  If you want to know more on this water color technique from ink Craftsy had a great class on it, called,  Wild Cards, 21 Techniques with Favorite supplies.

Here is another card that I did with the ink effect, I really like how it turned out.

Bubbles!


I love when we have a perfect day for playing with bubbles! it's my favorite activity to do with my kids. You can get bubble wands on amazon for way cheap, add some water and cheap bottle of soap to that you bought with a coupon for .75 cents to a tub and you got some good kid entertainment. My pre schooler is still out side playing with the bubbles.

The Art of Caramel and Peanut Brittle recipe

So, thinking about Christmas yet? Nope, well I sorta am, I wanted to get an idea of food gifts that I could give out during the Christmas season, I needed some where to start. Seriously if I had know how easy and cheap it was to make peanut brittle, I would never have bought Peanut Brittle! Keep reading for the exclusive recipe from craftsy on Peanut Brittle.

 It is said by America's test kitchen that you only need like 20 really good dishes to be called a good cook, I totally agree. With that thought in mind I think Caramel is a hard thing to accomplish well every time. I mean why does it crystallize, or burn so easy when I followed the recipe. Right? Right! So when I saw this class on Craftsy my eyes got really big with excitement and and I thought I needed to know how Caramel works.

I was pleasantly surprised by the content of this class! it's well thought out as most craftsy classes are, There is some small history lessons to help with what caramel is, which helped with making caramel.

This class will save me money in the long run, I always seem to want to have some peanut brittle during the Christmas season, and for about $2.00 a batch I can make peanut brittle to my little hearts content, or make it and give it out, smiling that you really only spent $2.00 on the gift, that could retail up to $15.00 (which btw is the cost of the class when it goes on sale!) I also posted about the Caramel candies, you can find my blog post here along with the recipe


One of the main reason's why I wanted this class was to figure out how to make caramel sauce, you know the dip used for apples, and a filling for chocolates, or bon bons. I finally have a perfect recipe for both with the knowledge to know just exactly what to do. (I learn best from watching then doing.)


Once you got the caramel sauce mastered, then it's onto cupcakes and those were so good! I had to pack them up for my husband's PTO meeting tonight, so I didn't eat them all up... and yes that is praline/peanut brittle on the top of the cupcake!


Way to Go Craftsy and Carole Bloom, I am a caramel know it all now! With the hopes of making a dry caramel desert in the future!

Carole Bloom's Peanut Brittle Recipe from Craftsy  
(Ingredients add up to $2.00, (peanuts and Sugar.))
Yield: 12/3 pounds (750 g) 

Ingredients
2 cups (400 g) granulated sugar
½ cup (120 ml) water
¼ teaspoon cream of tartar
2 cups (300 g) skinless roasted salted peanuts

Method
1. Line a baking sheet with a silicone non-stick liner.

2. Place the sugar, water, and cream of tartar in a 3-quart (2.8-l) heavyduty saucepan over medium-high heat. As the mixture cooks, run a damp pastry brush around the edges of the pan to push any stray sugar crystals back into the mixture. Do this two times.

3. The mixture will bubble around the edges first and then the bubbles will move to the center. Cook the mixture until it begins to turn color, about 7 minutes. If the mixture begins to color in one place, turn the pan and swirl it to help distribute the color evenly. Do not stir, which will cause the mixture to crystallize.

4. Once the mixture is evenly amber colored, immediately stir in the peanuts and completely coat them with the caramel.

5. Remove the pan from the heat and turn the mixture onto the lined pan. Using a silicone spatula, very quickly spread the mixture thinly. Leave the brittle to cool completely.

6. Lift the brittle from the liner and break into pieces by hand.

7. Store the brittle between layers of waxed paper in a tightly covered container at room temperature for up to 1 week. Variations Note: Any single type of nut or mixed nuts can be used, as well as any dried fruit.

If the nuts or fruit are large, chop them coarsely. Total volume of add-ins should be 2 cups.
For Almond-Date Brittle: Dates (coarsely chopped or cut with scissors) + toasted whole almonds.
For Peanut-Raisin Brittle: Salted or unsalted skinless roasted peanuts + raisins (your choice of color). For Pumpkin Seed-Apricot Brittle: Shelled toasted pumpkin seeds + chopped apricots.


Related Posts Plugin for WordPress, Blogger...